I decided my gray/blue/pink/taupe nails weren't quite right for a Saturday morning brunch on a hot summer day. So I decided to revisit my obsession with pretty blue greens.
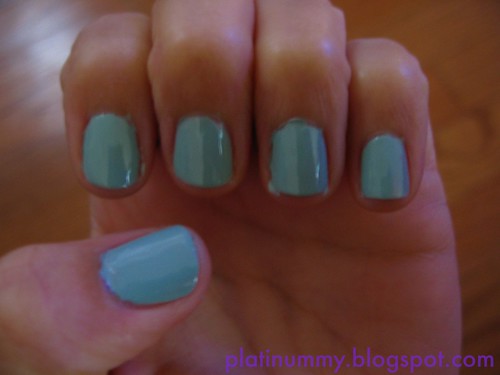
I've been loving OPI's Mermaid's Tears from the Pirates of the Caribbean collection. I don't actually own it, but I saw it earlier this summer on the toes of an acquaintance and couldn't get it out of my head. I had recently purchased the Sally Hansen Xtreme Wear Mint Sorbet, and I figured I could franken a rough approximation.
Sally Hansen Xtreme:
I added a few drops of China Glaze Concrete and Ulta Moody Blues.
Not bad eh?
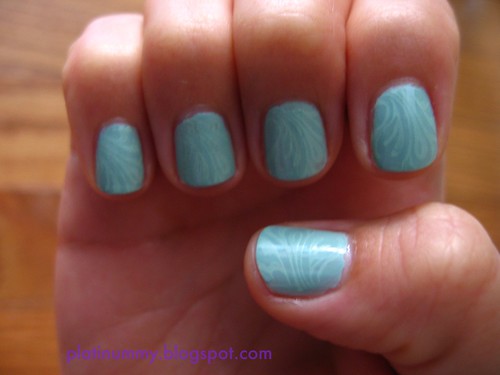
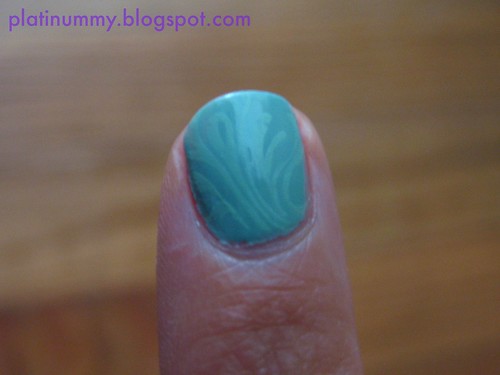
Then I stamped with Sally Hansen Xtreme Wear Mint Sorbet. The plate I used was MASH plate m63.
So I got this polish, China Glaze in the Mood Pink Shimmer to Purple Shimmer, from Rachel Marie's blog sale. It looked like an intriguing purple-y gray. But in real life, it is just a very odd color. I'm guessing it's oddness has to do with the fact that it is an old color change polish and its color changing days are long over.
Inside in artificial light it looks like a pinky taupe.:
Inside with flash the pink shimmer really comes out:
I stamped with Ulta Moody Blues and the MASH plate m78. Top coat is Nicole by OPI.
Outside it's a blue gray.
And from afar:
I decided to franken that sucker (results in a later post)!
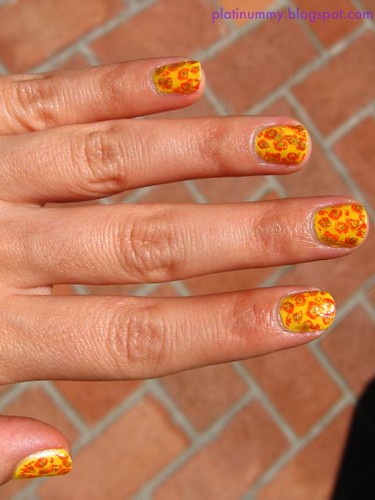
As a child of the '80s, I was all about Thundercats and Cheetara in particular because she was such a freakin' badass.
I mean c'mon!
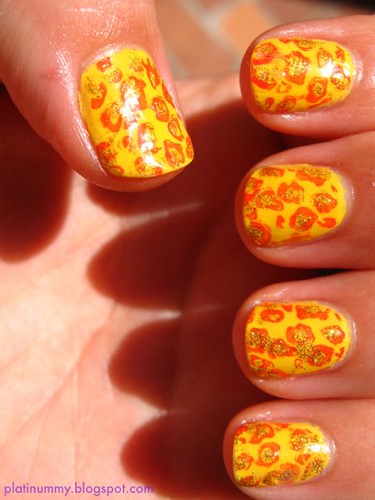
So when I was invited to a Thundercats premiere watching party, I thought I should have a manicure that reflected my affinity for the fastest Thundercat of them all (who's also pretty good with a bo staff).
I used Urban Outfitters in yellow, Revlon Orange Flip, and L.A. Colors in gold. Base coat by L'Oreal and top coat by Nicole by OPI. The stamping plate I used was Bundle Monster BM-221.
I must admit, it was a bit of a rush job and it shows. And in retrospect, it probably would have looked better if I'd incorporated black. But oh well!
And from afar:
A Jem t-shirt completed the look. :) After watching the premiere (good, but not as good as the original), we watched the She-Ra/He-man movie. All in all, a very fun '80s cartoon night.
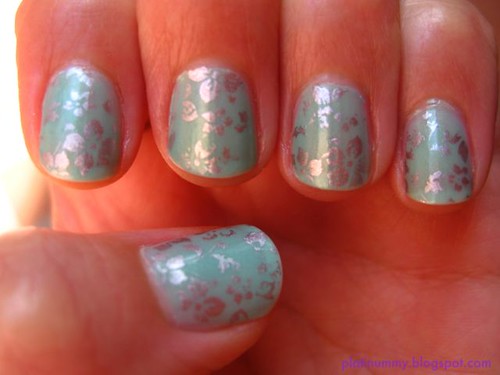
After the craziness of my last rainbow dots manicure, I was in the mood for something a little more delicate.
I layered two coats of City Color mint green and stamped it with Urban Outfitters silver. The plate I used was Bundle Monster BM-221.
I'm not usually a girly girl, but I love how feminine it is.
And from further away:
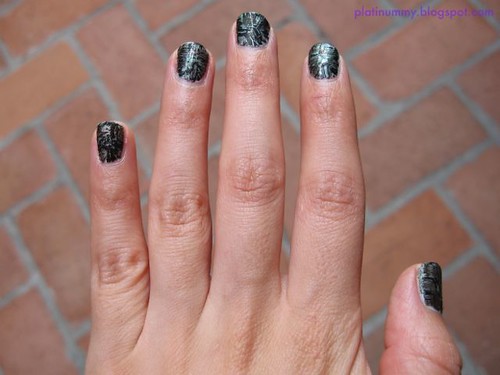
After a few days I decided to top it with OPI shatter. Instead of brushing from the bottom up, I brushed in from the outside edges. I think the resulting look was an interesting pewter/brushed metal effect. I liked the matte finish too, so I didn't put a top coat on.
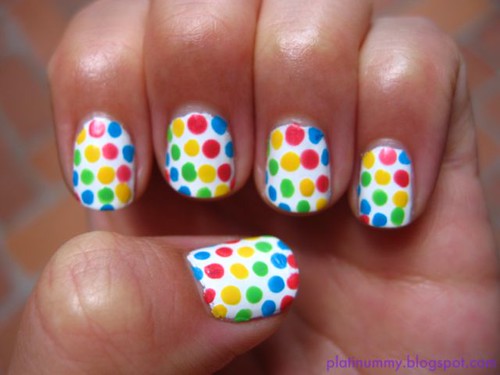
I used L'Oreal base coat, Santee white as my base color, and newspaper comics as my transfer image. Unfortunately, the image just did not transfer at all. All I got was a gray smudge. I later discovered that my lack of success was probably due to the fact that newsprint cartoon dyes aren't as intense as actual comic book dyes. I'll give it another try with a Betty and Veronica comic book sometime.
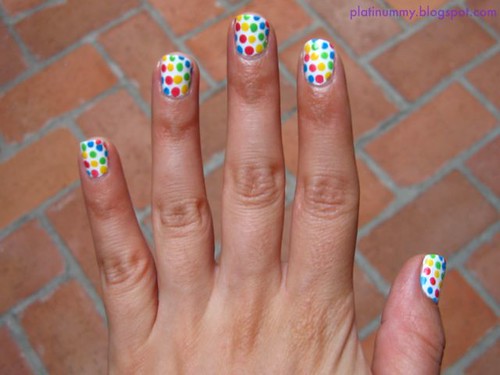
I was left with white nails and wanted to try something different. So I got out my dotting tools and some of my old and new bright colors (Sally Hansen and Urban Outfitters).
Check out the results:
I loved how it turned out. Everywhere I went people were asking about my nails and asking if they were stickers. I also must say my baby nephew was completely hypnotized by my nails. He wanted to eat them up!
From further away:
And from even further away:
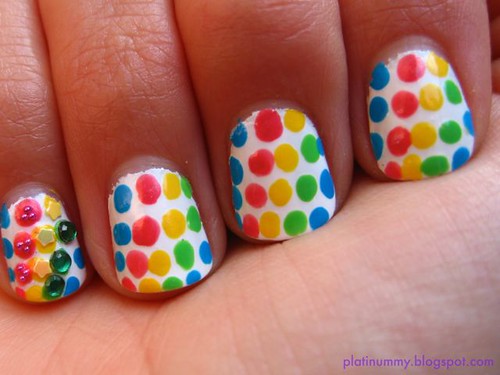
With pinky jewels (and sequins, and microbeads):
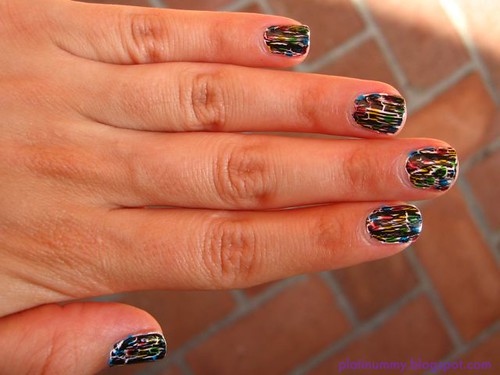
And finally, with OPI shatter:
Crazy right? It kind of reminded me of the drawings you make when you're a kid where you color with crayons, color over it all with black crayon, and then scrape the black crayon away. Know what I'm talking about?
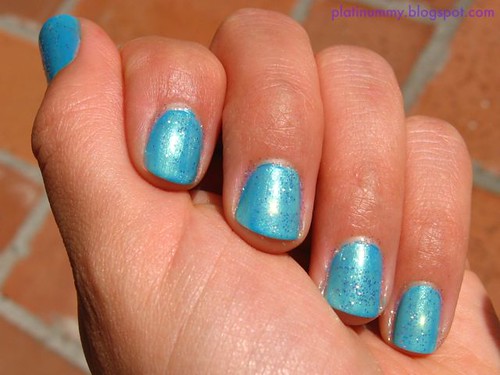
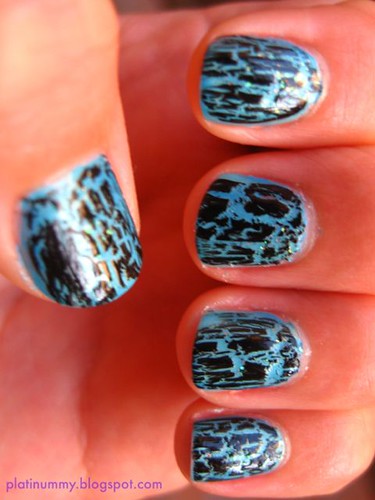
Even after my franken fiasco, I still couldn't give up on creating some sort of glittery greenish blueness. So I tried layering instead. I started out with Urban Outfitters blue as a base coat, layered the shimmery City Color mint green over it, and then sprinkled some fine loose glitter on top.
Here was the result:
As much as I enjoyed it, I still wanted to increase the oomph factor, so I added some OPI black shatter from the Katy Perry collection (purchased online from drugstore.com with an extra discount through ebates.com) and Nicole by OPI top coat.
Check it out:
Very cool. (Sorry for the lack of cuticle cleanup in the above pic, there's top coat everywhere!)
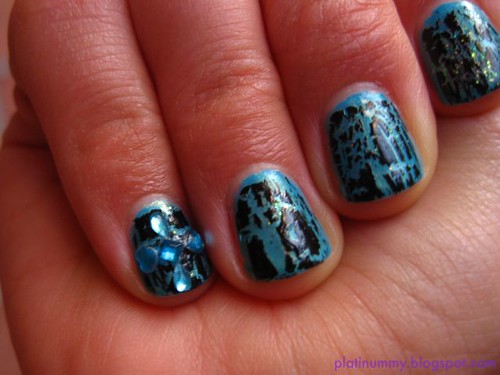
But I wasn't done yet! I went on to add a few rhinestones to my pinky fingernail. This was my first experience using nail jewels. I wouldn't say it was a total success, but I thought it was fun. Since the jewels were the same color as the polish, they were not actually very noticeable.
Obviously this manicure looks a little loco, especially from up close. But how does it look from afar? I never see people posting far away pics. And I think it's a good frame of reference, especially for the crazier designs. So here's how this manicure looked from afar.
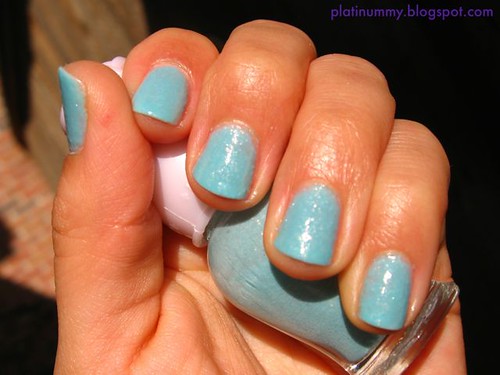
I'd been wanting to franken a glittery robin's egg blue for quite a while. After my blog sale haul, I was excited to get started. I used Etude House's very very sheer mint green as my base color and was off to a promising start after adding some Urban Outfitters blue and green and Santee white. It looked like a creamier, bluer version of the City Color mint green.
Pretty good, in the bottle at least.
Unfortunately, things started going wrong when I added the glitter. Despite a successful sample test, the glitter color started to leach once it had been in the polish for a little while, turning the whole thing into a slightly grayish, gritty, and not particularly glittery mess.
I picked up the following nail polishes from Rachel Marie's blog sale. I was happy to get some blues, greens, and yellows to add to my growing collection instead of just my usual reds, pinks, and burgundies.
From left to right we have Etude House in a light mint green (a freebie I picked because I liked the bottle), City Color in a shimmery mint green, the 6 minis with white tops are Urban Outfitters, Ulta Moody Blues, and China Glaze In the Mood in purple shimmer to blue shimmer.
My next attempt at stamping involved a little more pizzaz.
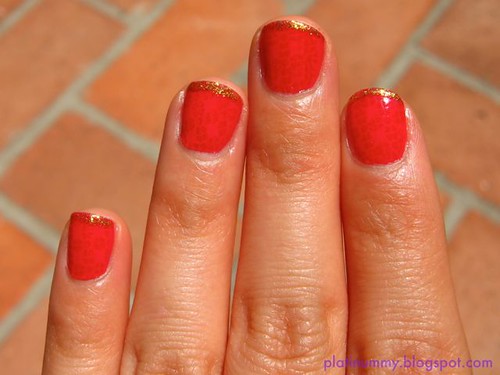
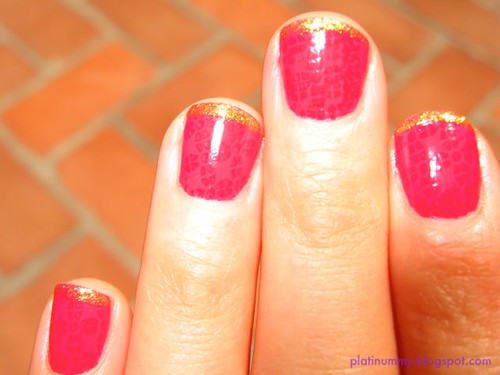
I used the following colors: a mystery brand in Rock-On Red as my base color, a mixture of Revlon Top Speed in Reddy and Revlon Cherries in the Snow for stamping, Nicole by OPI top coat, and L.A. Colors Art Deco in a fine gold glitter for detailing. I picked the gold up at Dollar Tree for a dollar!
The results were like so:
And here's one with flash so you can see the stamping. I stamped with Bundle Monster plate BM10 (which I got as a single plate on eBay to test out the Bundle Monster plates before I committed to the set).
The gold tips were inspired by Jessie J's nails at the 2011 Glamour Women of the Year Awards, as seen here.
Although the results of the stamping were very subtle and definitely not noticeable from any distance at all, I really liked the fact that it added texture as opposed to color.
I was very excited when my first mini haul of nail art supplies arrived in my mailbox.
I got the stamp and scraper and dotting tools on eBay and the 25 Mash plates on Amazon. All were super cheap. I did end up with two of the same Mash plates, and when I contacted the seller through Amazon to rectify the situation, they sent me a few more plates... which were also duplicate plates, but with bigger images. Odd. I guess the bigger images will come in handy because the other full nail images looked pretty darn small, even for my small nails.
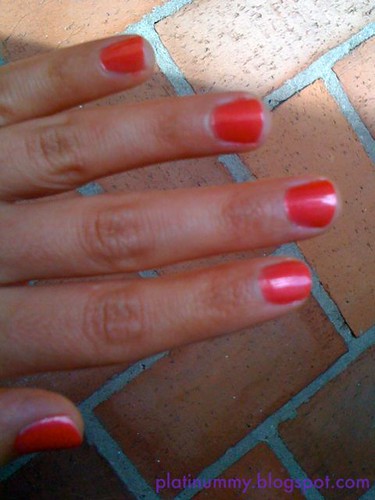
For my base color, I used an oldie but goody nail polish Sally Hansen Maximum Growth in "Baby Doll." It's a shimmery hot coral/salmon.
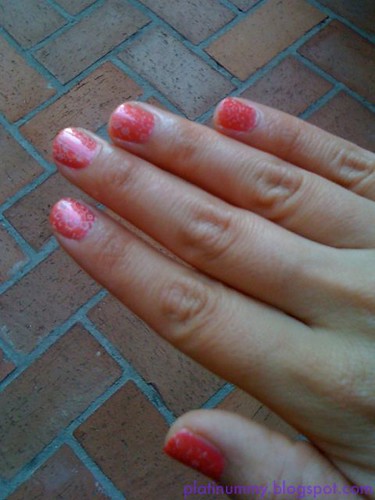
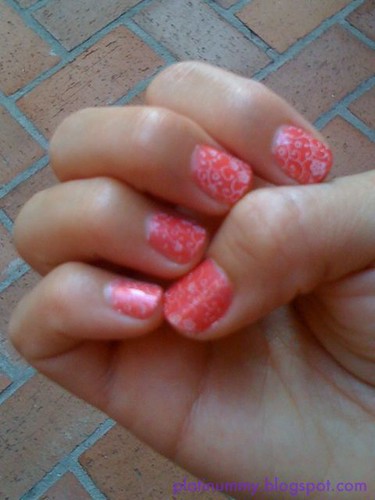
For stamping, I used Santee Plus in White. It's not the best for stamping because it's a little transparent, but it did a pretty good job. The Mash plate I used was m73.
So how did I get to this glorious place? To this newfound nail polish and nail art obsession? What led me here?
The answer is suede boots and YouTube. A convoluted Google search trail from "suede boots" to "shoe polish for suede boots" to "suede finish nail polish by OPI," eventually led me to YouTube videos such as this one:
SO badass!
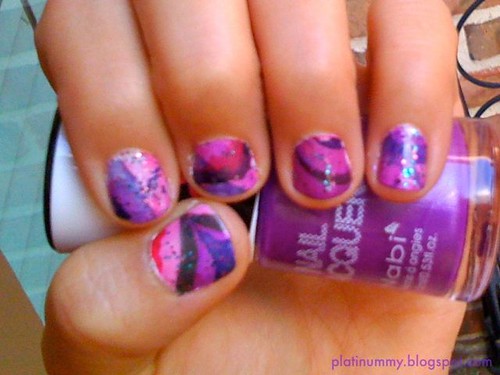
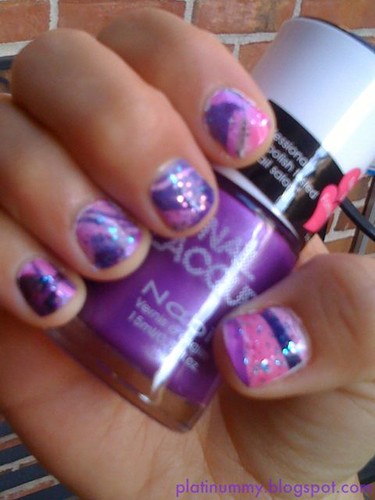
I had to try it out for myself. My results were a little different.
My first experiment with water marbling was quite messy, took over an hour, and generally looked a little crazy, but it definitely kicked off a full on obsession. :)